 |
 |
Setting Up The ModuleWe will create the module using the following steps: |
 |
Create The DirectoriesOpen your DotNetNuke website in Visual Studio. |
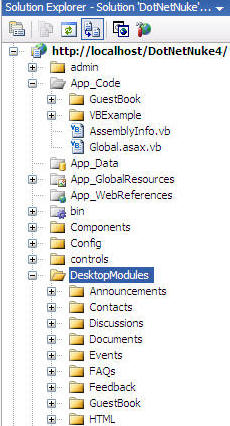 |
A DotNetNuke module resides in 2 directories.The Web User Controls and their associated code behind files reside in the "DesktopModules" directory and all other code (Data Access Layer and Business Logic Layer code) resides in the "App_Code" directory. |
|
Create the DAL+First we will create the Data Access Layer using the DAL+ method. This is the class that communicates with the database. |
|
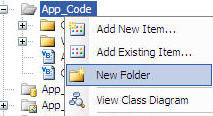
Create the "info class"Right-click on the "App_Code" folder and select "New Folder" |
 |
| Name the new folder "ThingsForSale" |
|
| Right-click on the "ThingsForSale" folder you just created and select "Add New Item" |
|
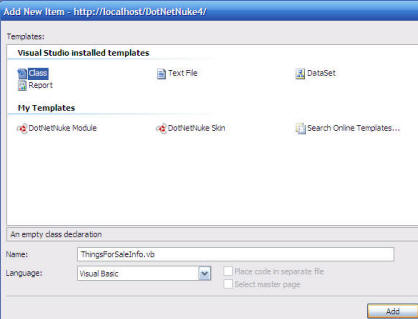
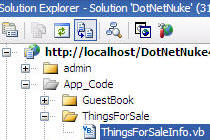
| In the "Add New Item" box that opens, click on "Class" under "Visual Studio Installed Templates", enter "ThingsForSaleInfo.vb" in the "Name" box and click the "Add" button. |
 |
| The class will now open up in the designer. | 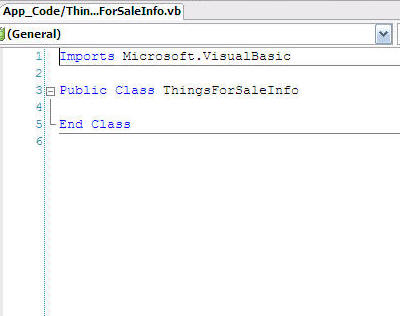 |
| Replace ALL the code with the following code: | |
Namespace YourCompany.Modules.ThingsForSale |
|
|
|
|
| We created a simple class file. This class when instantiated becomes
an object and that object will be used to pass the data between the Data
Access Layer that we are constructing and the Web User Control that we
will create later. Notice this class has one property for each field of data that we will need to transfer back and forth. |
|
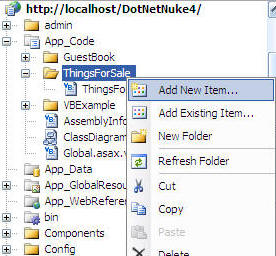
Create the "controller class"Right-click on the "ThingsForSale" folder and select "Add New Item". |
 |
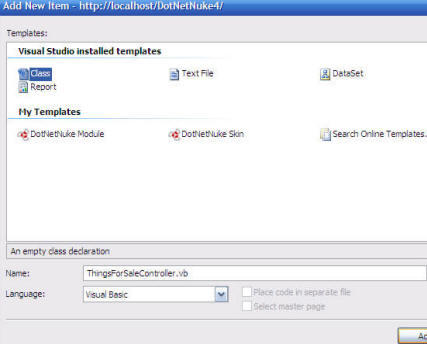
| In the "Add New Item" box that opens, click on "Class" under "Visual Studio Installed Templates", enter "ThingsForSaleController.vb" in the "Name" box and click the "Add" button. |
 |
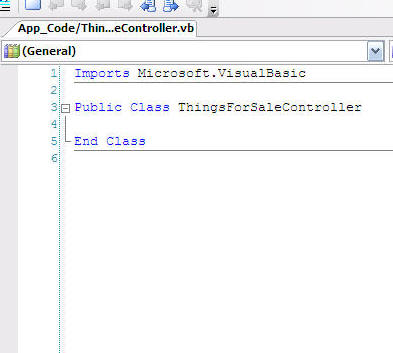
| The class will now open up in the designer. |
 |
| Replace ALL the code with the following code: | |
System Imports System.Collections.Generic Imports System.Data Namespace YourCompany.Modules.ThingsForSale Public Class ThingsForSaleController<DataObjectMethod(DataObjectMethodType.Insert)> _ DataProvider.Instance().ExecuteNonQuery("ThingsForSale_Insert", ThingsForSaleInfo.ModuleId, GetNull(ThingsForSaleInfo.UserID), GetNull(ThingsForSaleInfo.Category.ToString), GetNull(ThingsForSaleInfo.Description.ToString), GetNull(ThingsForSaleInfo.Price)) End Sub <DataObjectMethod(DataObjectMethodType.Delete)> _ DataProvider.Instance().ExecuteNonQuery("ThingsForSale_Delete", ThingsForSaleInfo.ID) End Sub <DataObjectMethod(DataObjectMethodType.Update)> _ DataProvider.Instance().ExecuteNonQuery("ThingsForSale_Update", ThingsForSaleInfo.ID, ThingsForSaleInfo.ModuleId, GetNull (ThingsForSaleInfo.UserID), GetNull(ThingsForSaleInfo.Category.ToString), GetNull(ThingsForSaleInfo.Description.ToString), GetNull(ThingsForSaleInfo.Price)) End Sub <DataObjectMethod(DataObjectMethodType.Select)> _ Return CBO.FillCollection(Of ThingsForSaleInfo)(CType(DataProvider.Instance().ExecuteReader("ThingsForSale_SelectAll", ModuleId), IDataReader)) End Function Private Shared Function GetNull(ByVal Field As Object) As Object Return Null.GetNull(Field, DBNull.Value) End Function End Class End Namespace |
|
| This time we did a lot. However, we did a lot without using a lot of
code.
We have constructed a class called "ThingsForSaleController" that has 4 public methods. Each of these methods uses one of the new methods of the DAL+ to execute stored procedures. |
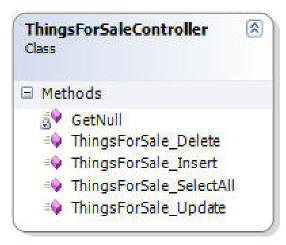 |
| We haven't created the stored procedures yet. We will do that in a later step. For now, we have simply created a method for each task we will need to perform with the database:
Note: A protected method, "GetNull" is used to pass the proper null value to the database for any values that could be empty. |
|
| The Delete, Insert, and Update methods accept the "ThingsForSaleInfo" class that was created previously as a parameter.
|
|
| The SelectAll methods takes an integer as a parameter and RETURNS a "ThingsForSaleInfo" class.
|
|
The DAL+ is comprised of 4 methods used to execute stored
procedures. The methods are:
|
 |
| The Delete, Insert, and Update methods use the ExecuteNonQuery method of the DAL+ and the SelectAll method uses the ExecuteReader method of the DAL+ (the ExecuteScalar and ExecuteSQL methods of the DAL+ are not used in this tutorial). |
 |
|
Below is an explanation of the format used to implement the DAL+. The ExecuteReader method that is used in the "ThingsForSale_SelectAll" method is used in this example:
|
|
We have completed creating the DAL+ for our module.Now, the steps that remain are: |
 |
BACK
|
Next: Create the "View" control |
(C) by Michael Washington - ADefWebserver.com - Webmaster@ADefWebserver.comDotNetNuke® is a registered trademark of Perpetual Motion Interactive Systems Inc. |
|